Install and first launch
Version 19.0.1 is the first official V19 release. You need Python 3.11 or 3.12 with tkinter, installed via uv. Python 3.13 is not supported.
Install with uv and tkinter
You need three things: uv, a Python environment that includes tkinter, and on macOS, for AI Features, the C++ libray libomp.
1. Install uv
uv manages Python, the virtual environment, and large AI packages.
# macOS / Linux
curl -LsSf https://astral.sh/uv/install.sh | sh

# Windows (PowerShell)
irm https://astral.sh/uv/install.ps1 | iex
Confirm uv is available:
uv --version
2. Install Python with tkinter, then the app
The desktop window needs tkinter. Install a Python that includes it, then create the venv and install 19.0.1:
| Platform | Ensure tkinter is available |
|---|---|
| Windows | Install Python 3.11 or 3.12 from python.org with Add to PATH and tcl/tk and IDLE checked |
| macOS | Prefer uv python install 3.12 (Tk 9.x). Or Homebrew: brew install python@3.12 python-tk@3.12 |
| Linux | sudo apt install python3.12 python3.12-tk python3.12-venv (or matching 3.11 packages) |
uv python install 3.12
uv venv rsna-anonymizer --python 3.12
source rsna-anonymizer/bin/activate   # Windows: rsna-anonymizer\Scripts\activate

uv pip install rsna-anonymizer       # version 19.0.1
3. Verify the install
python --version          # 3.11.x or 3.12.x
python -m tkinter         # a small Tk window must open — required for the UI
rsna-anonymizer --version # should report 19.0.1
If python -m tkinter fails, recreate the venv with a Python that includes Tk (table above), then reinstall.
4. macOS only — OpenMP for AI Features
On macOS, AI Features (TotalSegmentator / Harmonize contrast and related tools) need the C++ OpenMP library **libomp. Install it once with Homebrew before** you download or run those models:
brew install libomp
Without libomp, Harmonize contrast can crash (for example exit 139 or XGBoost OpenMP errors). Linux and Windows normally do not need this step.
5. Run
rsna-anonymizer
First launch
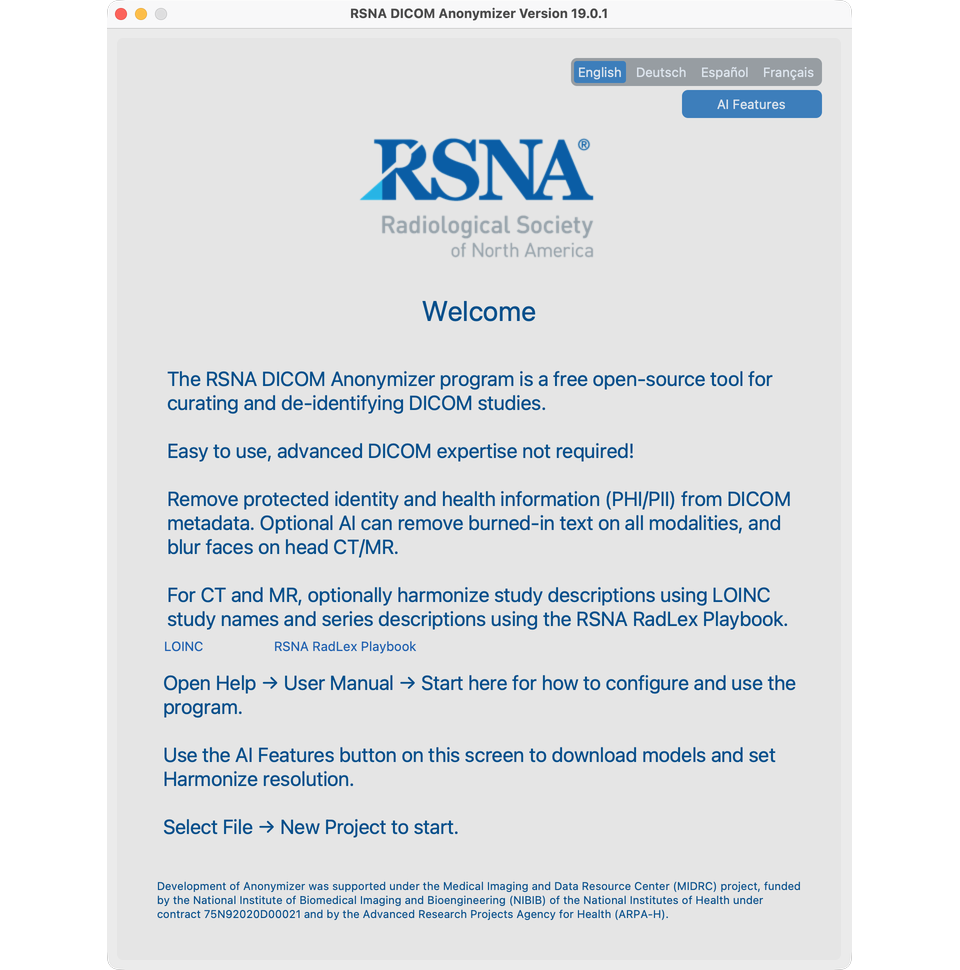
- The Welcome screen opens.
- Optional but recommended: click AI Features on Welcome to download models / accept the face license (see AI Features setup). Setup is only available from Welcome — close the project to return there later. On macOS, install
libompfirst (step 4 above). - Create or open a project from the File menu.
Upgrade
source rsna-anonymizer/bin/activate
uv pip install --upgrade rsna-anonymizer
See the CHANGELOG for release notes.
Next steps
- AI Features setup — from Welcome, download models (optional but recommended)
- Words we use, then Create a project