Send
Goal
Send anonymized patients to a remote DICOM system or AWS S3. Watch status until rows show as sent.
Before you start
- Configure the Export Server (or AWS Cognito for S3) in Project Settings.
- Import at least one study so the Send list is not empty (Search or Dataset).
Workflow
1. Initial Send view
- From the Dashboard, click Send.
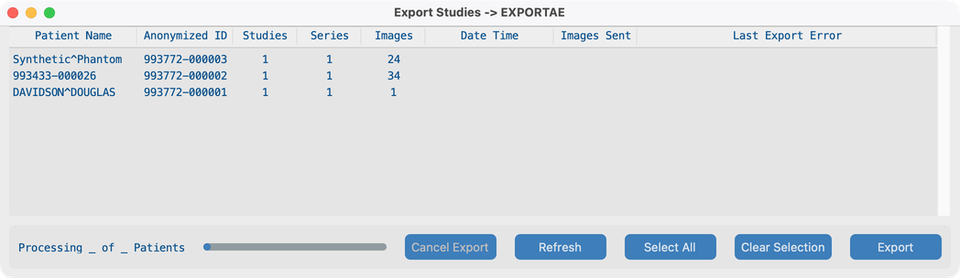
- The Export window lists anonymized patients (a patient may include several studies).
- Confirm the title shows your destination (export AE title or AWS project).
2. Select patients
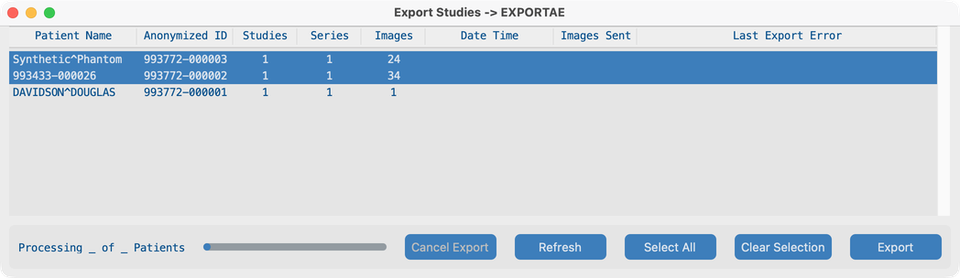
- Click one or more patient rows (SHIFT / CMD or CTRL for multi-select), or click Select All.
- Use Clear Selection if you need to start over.
- Already-sent rows (green) are usually left alone; the app does not re-send completed objects by default.
3. Sending
- Click Export.
- For DICOM destinations, the app echoes the export server first; fix connection errors with IT if echo fails.
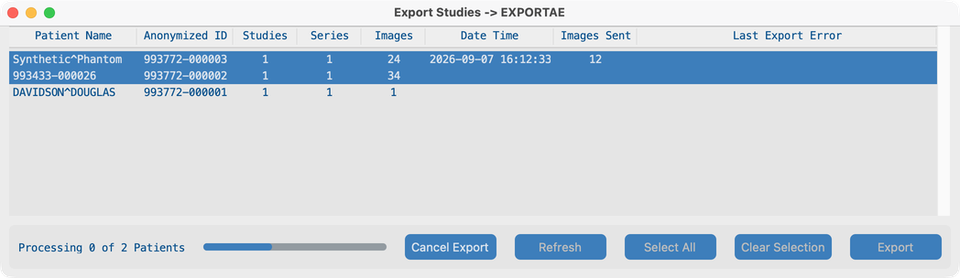
- While export runs, action buttons disable, Cancel Export enables, and the status line shows progress (for example Processing 0 of N Patients).
- Date Time and Images Sent update as each patient finishes.
4. Sent
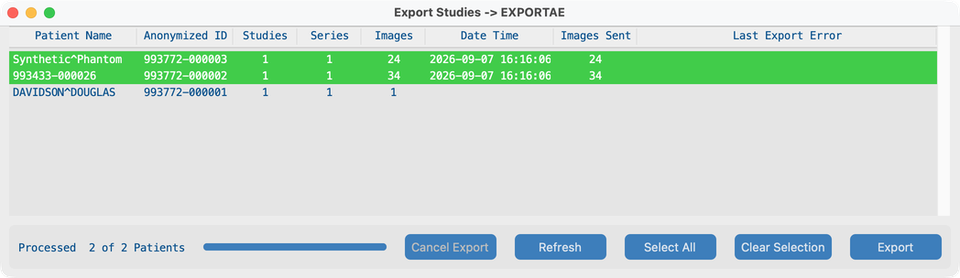
- When all selected patients finish, status shows Processed N of N Patients.
- Successful rows turn green with Date Time and Images Sent filled.
- Patients you did not select stay unchanged.
- Failed rows turn red and show Last Export Error; select them and export again if needed.
What good looks like
- Selected patients complete with green rows and matching Images Sent counts.
- Destination PACS or S3 bucket shows the anonymized studies.
If it fails
- Echo / auth failure → check export server or AWS Cognito credentials with IT.
- Nothing selected → select patients first.
- Partial failures → read Last Export Error, fix the destination, re-select red rows, Export again.
Next steps
Optional: Run headless for lab/server receive or overnight batch.