Operation
Importing files
Import from local file system
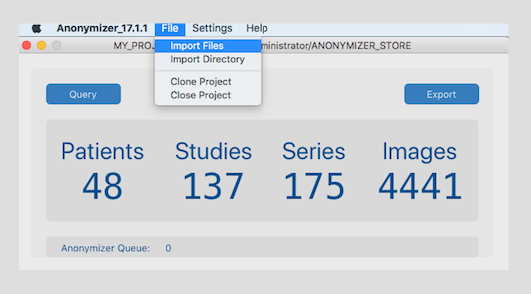
- Import DICOM Files either individually or as a directory.
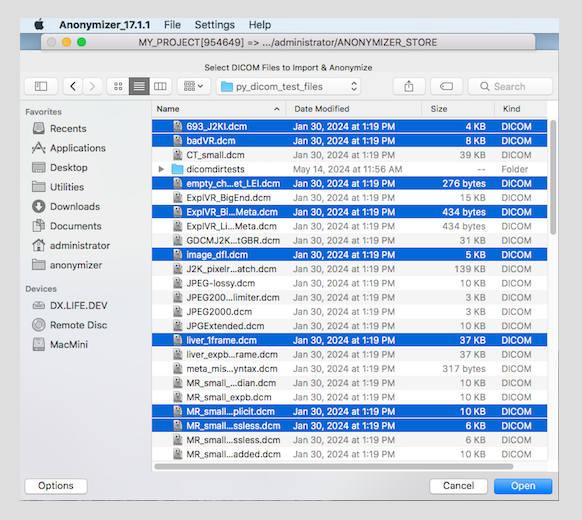
- When selecting individual files, the default suffix is .dcm but this can be changed using the file selection dialog options.
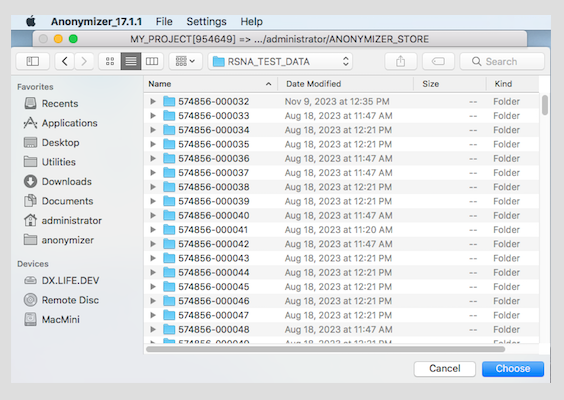
- When selecting a directory, all files in that directory and it's sub-directories will attempt to be imported.
- For a file to be accepted and imported it must:
- Be a valid DICOM file (as per the DICOM standard) with valid File Meta Information including DICOM preamble in file header.
- Contain the attributes:
- SOPClassUID
- StudyInstanceUID
- SeriesInstanceUID
- SOPInstanceUID
- Storage class must match one of the storage classes set for the project. (see Modalities & Storage Classes in Help/Project Settings)
- Successfully have its PHI captured
- Not imported before, ie. SOPInstanceUID not stored in Anonymizer datastore.
- If a file fails the conditions above it will be Quarantined in the storage directory, ie. for the first 4 cases respectively:
- /private/quarantine/Invalid_DICOM
- /private/quarantine/Missing_Attributes
- /private/quarantine/Invalid_Storage_Class
- /private/quarantine/Capture_PHI_Error
- If a file has already been imported it will be ignored.
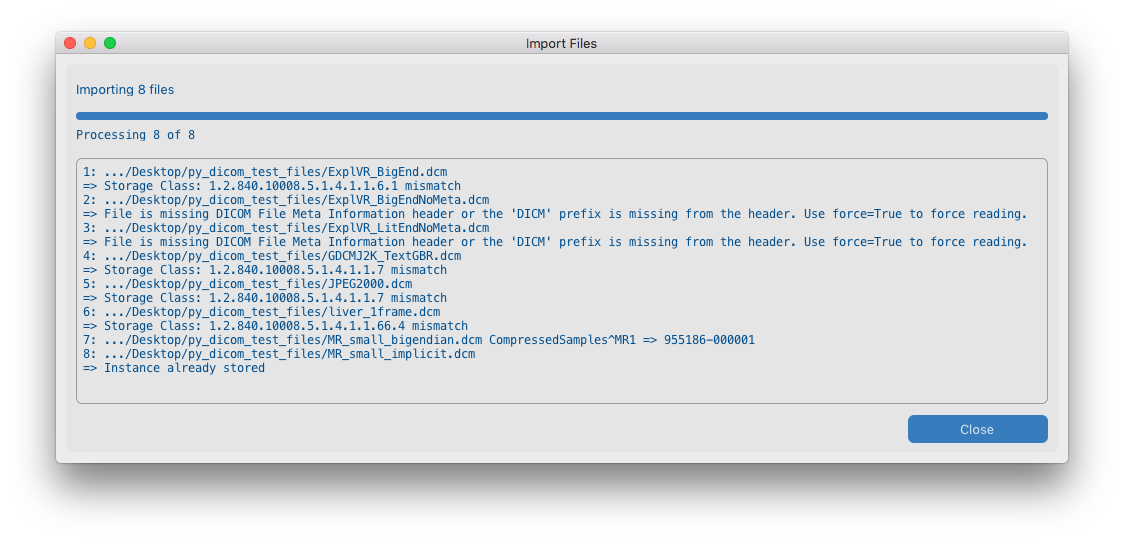
- The file import dialog displays the outcome of each file import on each line in its scrollable text box.
- If a file is successfully imported it will show an abridged file path followed by PHI Patient ID => Anonymized Patient ID as shown in screenshot below.
- If there is any error it will display an abridged file path followed by a suitable error message on the next line, as shown in screenshot below.
Import from remote DICOM Server
On the dashboard click the Query button to first send a DICOM echo to the remote server and if successful, open the Query, Retrieve & Import View.
The Query, Retrieve & Import View

Searching for Studies
- A remote DICOM server can be queried to list matching studies in the Query results view using one or a combination of the standard query fields:
- Patient Name: Alphabetic characters with and without accents, digits, ^ separator, ? for single character wildcard, * for string wildcard
- Patient ID: ASCII characters and digits, ? for single character wildcard, * for string wildcard
- Modality: Drop down list box with the modalities as configured in Project Settings
- Study Date: Specific data or date Range with format YYYYMMDD-YYYYMMDD
- Accession No.(s): ASCII characters, digits and "/-_,." ? for single character wildcard, * for string wildcard
- A comma delimited list can be entered into Accession No.(s) to perform multiple searches.
- Bulk Accession Number search via the Load Accession Numbers button and a text file with suffix ".txt" or ".csv" containing a comma or carriage return delimited list.
- The Show Imported Studies switch at the top right controls whether imported studies are included in the search result list.
- Only studies containing modalities set for the project will be displayed and available for selection.
Selecting Studies and Importing

- Studies can be selected individually (mouse click), in groups (hold down CMD or CTRL key) or in bulk using the Select All button.
- De-select studies by individual clicking or using the Clear Selection button.
- Before importing studies choose which level (Study, Series, Instance) to use for the import process (via DICOM C-MOVE) from the drop down, Move Level.
- Clicking the Import and Anonymize button will initiate the Import Studies Dialog.
- The remote server will first be queried for each selected study to compile a Study UID Hierarchy corresponding to the selected move level.
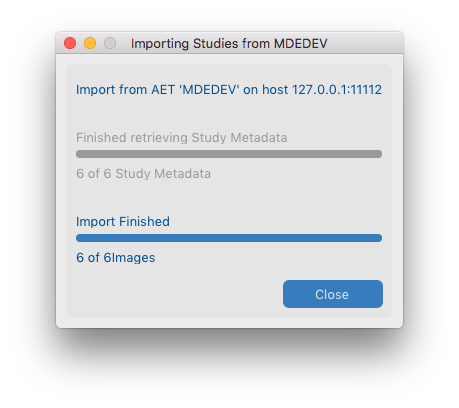
- The import will then be initiated and the Import Studies Dialog will display a progress bar tracking the number of images imported out of the study hierarchy.
- The import process will finish once all studies have been requested and either all files in a study received or a timeout occurred.
- If the remote server does not respond within the project's timeout setting: Network Timeout for each file transfer the import process for this study is terminated.
- The Import Studies Dialog will show the result of the import process when complete as shown in the screenshot below:
- After closing the Import Studies Dialog using the Close button the successfully imported studies will be highlighted green in the Query Results view as shown below:

Handling DICOM Move Issues
- If the import process fails to import all the studies successfully, adjust the Network Timeout and Move Level and try again by clicking the import button.
- The Anonymizer has been designed to handle C-MOVE non-compliant DICOM servers, especially VNAs which operate in asynchronous mode with unknown priority and timeout settings.
Exporting files
On the dashboard click the Export button to first send a DICOM echo to the remote server and if successful, open the Export View.
The Export View

- The Export view operates in similar way to the Query view, where imported & anonymized Patients can be selected for exporting either to a remote DICOM server or an AWS S3 bucket.
- Patients may contain multiple studies that were imported independently by the import process.
- Before sending a file, the Anonymizer will check with the remote server (SCP or AWS) whether it already been sent and not re-send it.
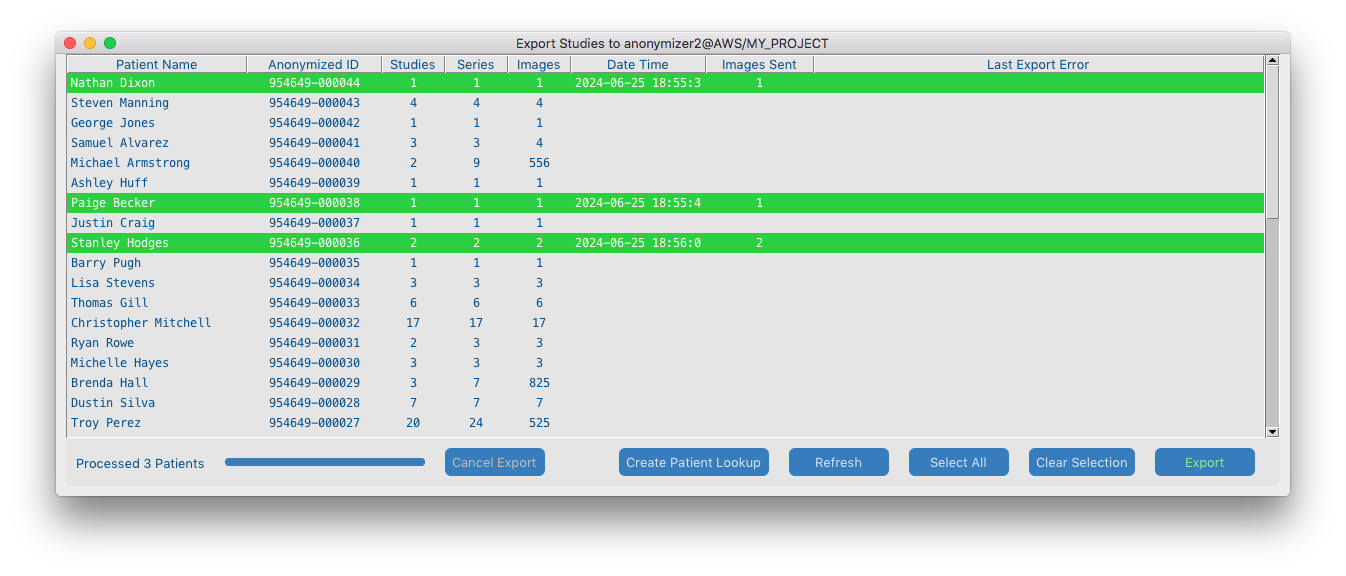
- The export status will be shown in real-time on the export view.
- The Date & Time of a successful Patient export and a progress bar is displayed as shown in the screenshot below:
Export Patient Lookup CSV File

- A patient lookup file which contains the project's PHI data can be created at anytime during a project using the Create Patient Lookup button on the Export View.
- The PHI data file is saved in CSV format to the storage directories private sub-directory here:
- /private/phi_export/
- The format of the lookup file follows the JAVA Anonymizer index file with the following fields appended to each study row: Number of Series, Number of Instances

Dashboard

- The project dashboard displays relevant project metrics related to the currently curated dataset in the storage directory.
- The Query and Export Views are launched from the dashboard using the corresponding buttons.
- The number of files waiting in the Anonymizer queue to be anonymized by an anonymizer worker thread is shown at the bottom left of the dashboard.
- The status of an operation initiated from the menu or dashboard is shown at the bottom right of the dashboard.


